How to create Slab rebar in Revit easily

How to Create Slab Rebar in Revit with the BIMspeed Slab Rebar Plugin
Creating slab rebar in Revit has never been easier, thanks to the BIMspeed Slab Rebar Plugin. This powerful tool streamlines the process, making rebar detailing faster and more accurate. Here’s a quick guide to get started:
- Install the Plugin
Download and install the BIMspeed Slab Rebar Plugin from the official Autodesk App Store or BIMspeed website. - Access the Plugin
After installation, you’ll find the plugin under the “Add-Ins” tab in Revit. - Prepare Your Slab
Open your Revit project and ensure the slab is modeled with proper dimensions and material properties. - Generate Rebar Layout
- Select the slab you want to reinforce.
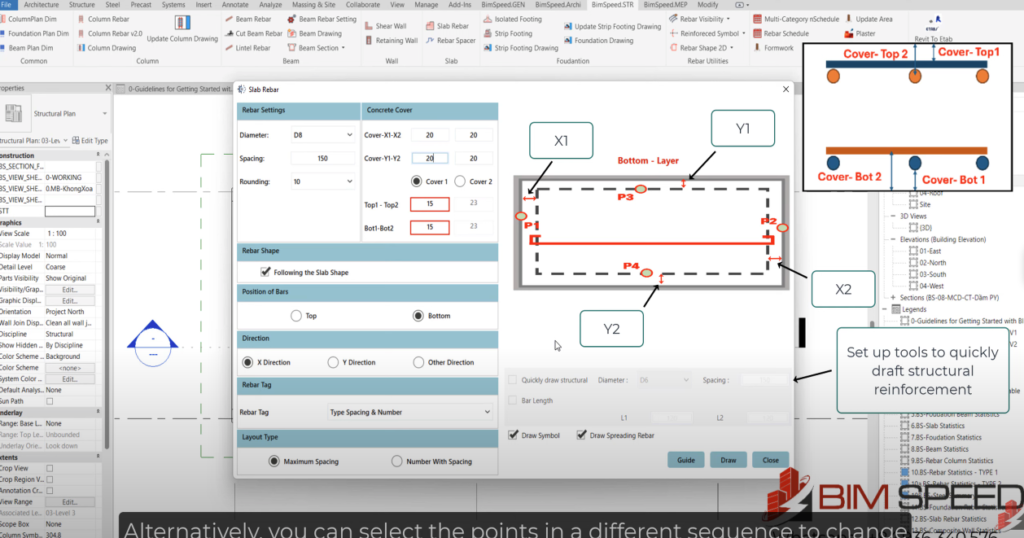
- Open the plugin and set parameters such as rebar spacing, diameter, and cover requirements.
- Use predefined templates or customize the rebar layout to suit your project specifications.
- Preview and Apply
The plugin generates a rebar layout preview. Adjust settings if needed, then apply the configuration. - Finalize and Export
The rebar is now embedded in your slab model. You can further refine the detailing or export it for fabrication and documentation.
With the BIMspeed Slab Rebar Plugin, you can save time, improve accuracy, and enhance collaboration on your structural projects. Try it today!
If you want to create BOQ for rebar please take a look this video
